Customer Keys (BYOK)
Provide your own TLS certificate and private key to encrypt OpenNVR's cloud streaming and recording connections — paste PEM text or upload files.
On this page
Customer Keys (BYOK) lets you supply your own TLS certificate and private key so that video streamed or recorded to a remote/cloud server travels over a connection you control. You’ll find it under Customer Keys (BYOK) in the sidebar (route /byok).
[!NOTE] Viewing requires the
byok.managepermission, and saving, uploading, or clearing certificates is superuser-only. Non-superusers see the fields but the Save Certificate and Upload Files actions are disabled, with the note “Admin privileges required to modify certificates.”
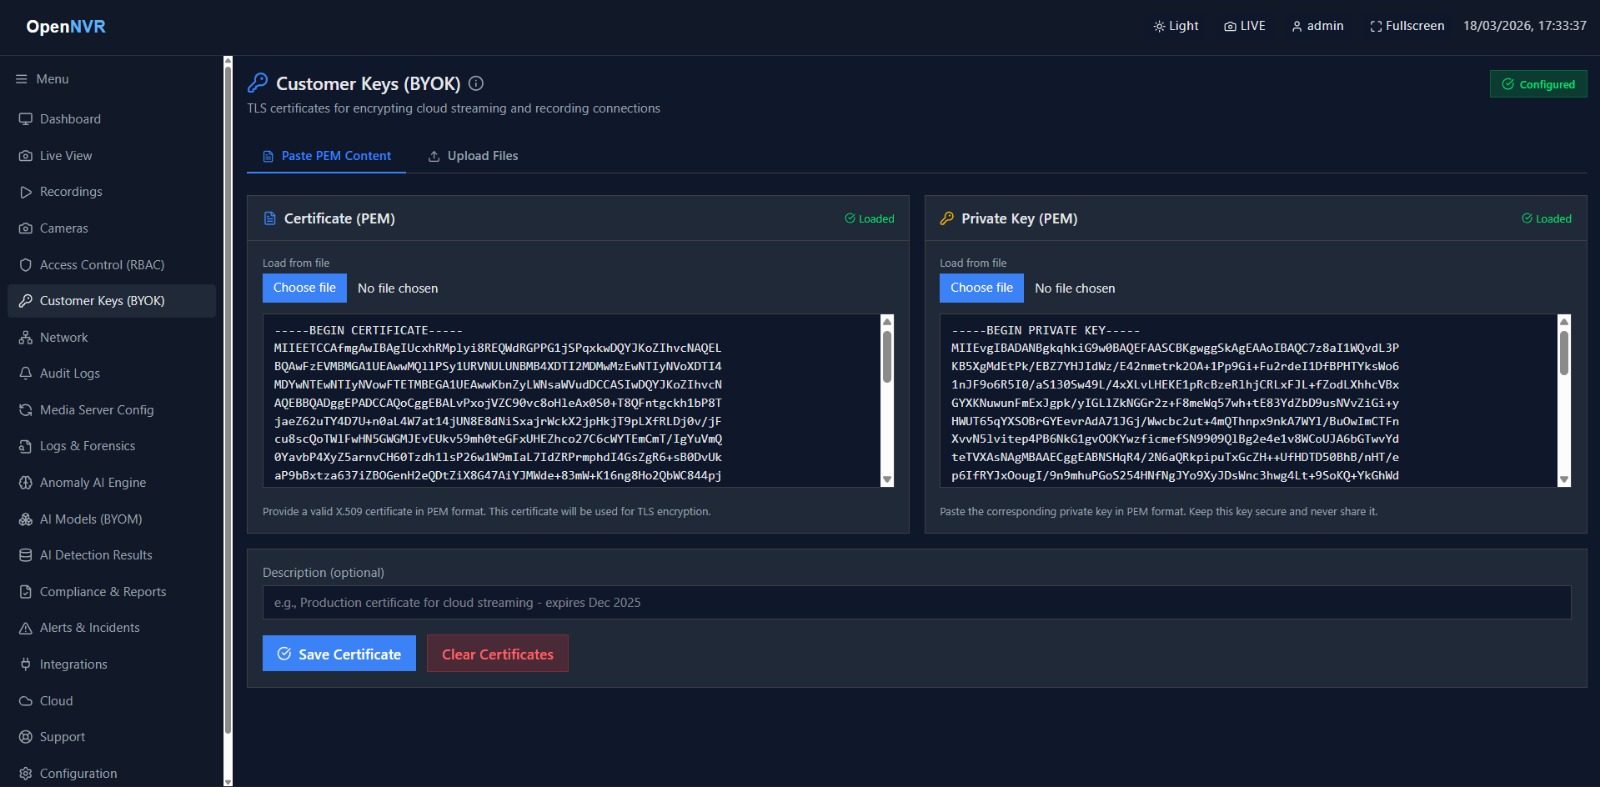
A status badge in the top-right reflects the current state:
- Configured — both a certificate and a private key are present.
- Incomplete — only one of the two is present.
- Not Configured — neither is set.
[!TIP] Click the info (ⓘ) icon next to the title to open the About BYOK dialog. It explains that BYOK is for pushing recordings to a remote cloud server or streaming video to an external server over the internet, and that it is not needed for local-only deployments with no cloud streaming or recording.
What you can do here
- Provide a TLS certificate + private key pair as PEM, either by pasting the text or uploading files.
- Optionally attach a CA bundle (certificate chain) when uploading.
- Add an optional description to record what the certificate is for and when it expires.
- Clear the stored certificate configuration.
The two methods are exposed as tabs: Paste PEM Content and Upload Files.
Provide a certificate by pasting PEM
- Select the Paste PEM Content tab.
- In the Certificate (PEM) panel, paste your X.509 certificate (or use Load from file to read a
.pem/.crt/.cer/.txtinto the box). The placeholder shows the expected shape:-----BEGIN CERTIFICATE----- MIIDXTCCAkWgAwIBAgIJAJC1... -----END CERTIFICATE----- - In the Private Key (PEM) panel, paste the matching private key (or Load from file —
.pem/.key/.txt):-----BEGIN PRIVATE KEY----- MIIEvgIBADANBgkqhkiG9w0B... -----END PRIVATE KEY----- - Optionally fill the Description field.
- Click Save Certificate. A green “Certificate saved successfully” notice confirms.
Each panel shows a green Loaded marker once its box has content.
Fields
| Field | Required | Example | Notes |
|---|---|---|---|
| Certificate (PEM) | ✓ | -----BEGIN CERTIFICATE-----… |
X.509 certificate in PEM format |
| Private Key (PEM) | ✓ | -----BEGIN PRIVATE KEY-----… |
The matching private key; keep it secret |
| Description | — | Production certificate for cloud streaming - expires Dec 2025 |
Free text label |
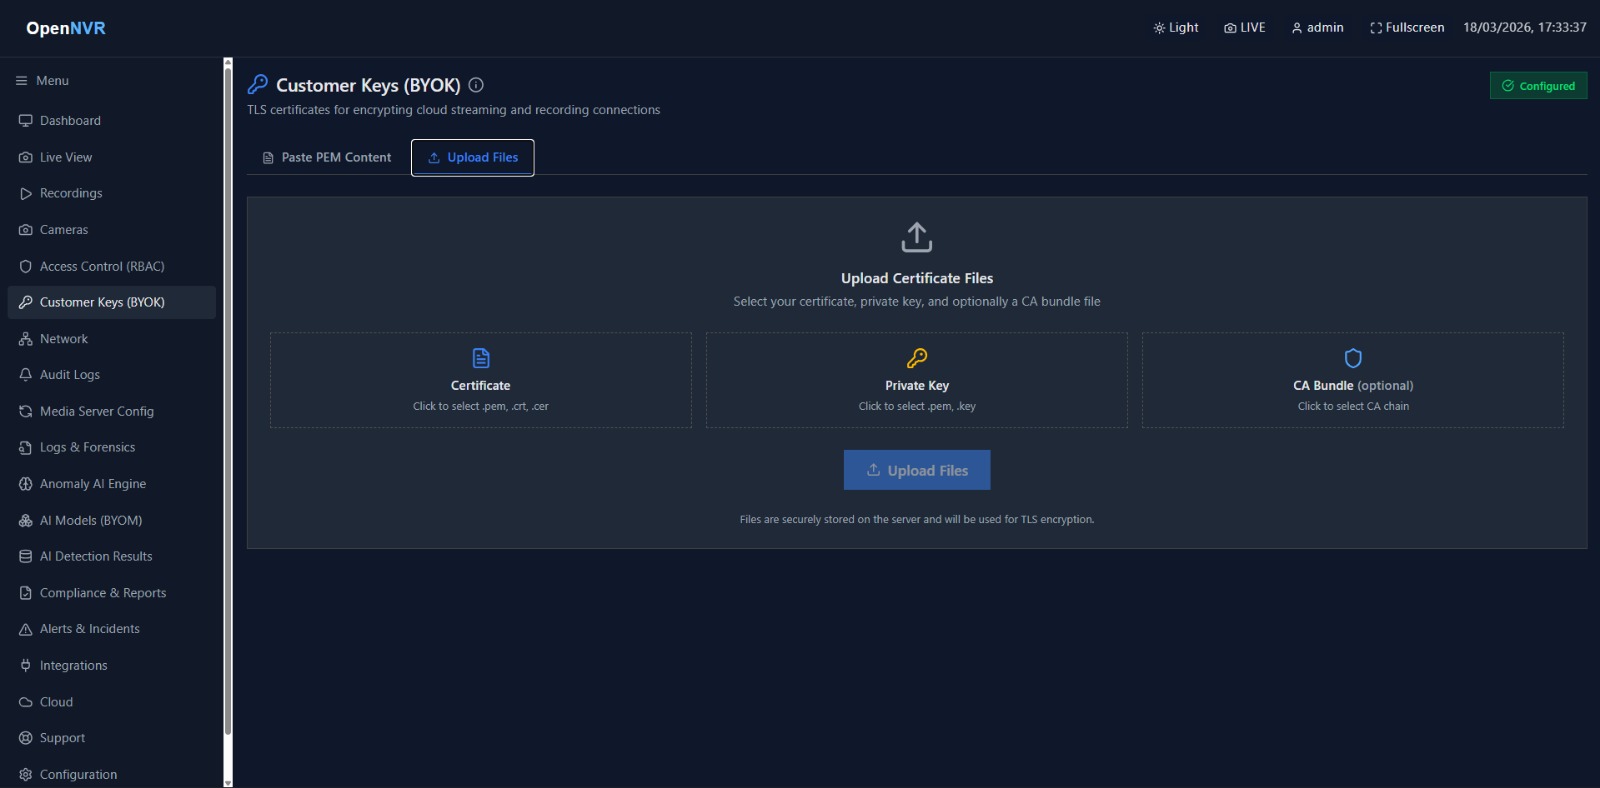
Provide a certificate by uploading files
- Select the Upload Files tab.
- Click the Certificate tile and choose a
.pem,.crt, or.cerfile. - Click the Private Key tile and choose a
.pemor.keyfile. - Optionally click the CA Bundle (optional) tile to add a certificate chain.
- Click Upload Files. A “Files uploaded successfully” notice confirms and the pasted-tab boxes refresh with the loaded content.
You must select at least a certificate or a key — otherwise you’ll see “Please select at least a certificate or key file.”
Upload fields
| File | Required | Accepts | Notes |
|---|---|---|---|
| Certificate | ✓* | .pem, .crt, .cer |
*At least one of certificate or key is required |
| Private Key | ✓* | .pem, .key |
*At least one of certificate or key is required |
| CA Bundle | — | certificate chain | Optional intermediate/root chain |
Clear the certificate
When a certificate or key is present, a Clear Certificates button appears on the Paste tab. Click it and confirm the prompt (“…This will remove the current TLS configuration.”) to wipe the stored certificate, key, and description.
[!NOTE] Certificates are stored server-side in the media-source settings (as
tls_cert_pem,tls_key_pem, andtls_cert_description) and used for TLS encryption of cloud streaming/recording. Configure your cloud recording or streaming server first, then add the certificate here.
[!WARNING] This feature does not generate keys and is not an at-rest encryption / HSM key manager. Obtain the certificate and private key from your own certificate authority before using this page.
Providing your own certificate helps satisfy enterprise compliance requirements (HIPAA, PCI-DSS, SOC2) for encrypted cloud transport.
📸 Screenshots to capture
Capture these from the running app and save them to opennvr-site/public/screenshots/ with the exact filenames below:
byok-paste-tab.png— the Paste PEM Content tab with the Certificate and Private Key panels and the Save Certificate button.byok-upload-tab.png— the Upload Files tab showing the Certificate, Private Key, and CA Bundle tiles.byok-status-configured.png— a close-up of the top-right status badge in the Configured state.