Cameras & Retention
Manage the camera fleet — the cameras table, add/edit forms with every real field, recording toggles, bulk actions, and where recording retention is configured.
On this page
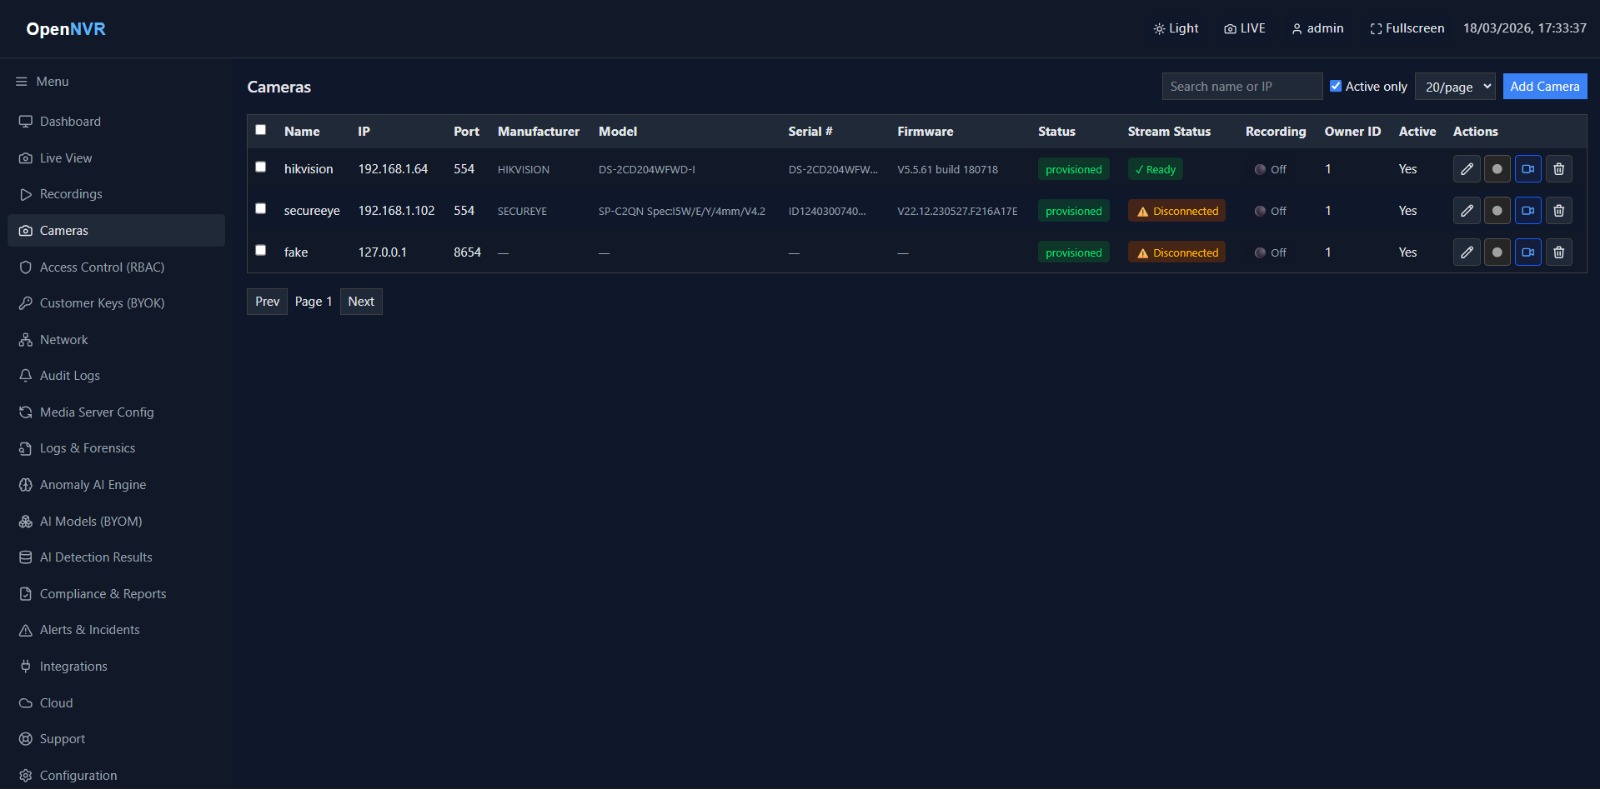
Cameras is the fleet-management table at /cameras, under NVR → Cameras in the sidebar. It lists every camera with its identity, stream health, and recording state, and is where you add, edit, and delete cameras. Viewing the table requires the cameras.view permission; adding, editing, deleting, recording, and bulk actions all require cameras.manage. The Owner ID column is superuser-only.
What you can do here
- Browse, search, and paginate the camera fleet.
- Add a camera (Discover or Manual) and Edit its full configuration.
- Start/Stop recording and jump to View Live for provisioned cameras.
- Delete a camera, or select several for bulk delete / bulk permission assignment.
- Configure recording retention (in Settings).
The cameras table
Each row shows these columns:
| Column | Shows |
|---|---|
| (checkbox) | Select the row for bulk actions |
| Name | Camera name |
| IP | IP address |
| Port | RTSP port |
| Manufacturer / Model / Serial # / Firmware | ONVIF device identity (back-filled when known) |
| Status | provisioned, unknown, or another provisioning state |
| Stream Status | ✓ Ready, ⚠ Disconnected, ✗ Error, — Not configured, or Disconnected when the Media Server is down |
| Recording | 🔴 Recording or ⚫ Off |
| Owner ID | Owning user’s ID (superuser only) |
| Active | Yes / No |
| Actions | Per-row buttons (below) |
Row actions
- Edit (pencil) — open the Edit Camera form. (requires
cameras.manage) - Start / Stop Recording — toggle recording; shown only for cameras that are provisioned to the Media Server. (requires
cameras.manage) - View Live — open the camera in Live View; shown only for provisioned cameras.
- Delete (trash) — remove the camera after a confirmation prompt. (requires
cameras.manage)
Search, filter & pagination
- Search name or IP — type in the search box to filter.
- Active only — a checkbox that limits the list to active cameras (on by default).
- Page size — choose
10/page,20/page, or50/page. - Use Prev / Next to page through results.
Add a camera
Click Add Camera (top-right, requires cameras.manage) to open the shared Add New Camera dialog with its Discover and Manual tabs. The dialog and its fields are documented on the Live View page.
Edit a camera
Click the Edit (pencil) action on a row to open Edit Camera: <name>.
Fields
| Field | Required | Example | Notes |
|---|---|---|---|
| Name | ✓ | Front Door |
Display name |
| IP Address | ✓ | 192.168.1.100 |
Camera IP |
| Port | — | 554 |
RTSP port; defaults to 554 (1–65535) |
| RTSP URL | — | rtsp://192.168.1.100:554/stream1 |
Main stream; has a Scan QR button to read a URL from the OpenNVR Cam app |
| Substream URL | — | Optional low-res feed for the camera agent’s live view | |
| Username | — | admin |
Camera login |
| Password | — | Leave blank to keep existing | |
| Location | — | Lobby |
Free-text location label |
| VLAN | — | Free-text VLAN label | |
| Description | — | Free-text notes | |
| Active | — | (checked) | Uncheck to deactivate the camera |
Click Update to save (the button shows Updating… while it saves), or Cancel to discard.
Bulk actions
Tick one or more row checkboxes (or the header checkbox to select the page) to reveal bulk actions (requires cameras.manage):
- Delete Selected (N) — delete every selected camera after confirmation.
- Assign Permissions — opens a panel to grant selected cameras to a user. Search a user by username or email, tick can_view and/or can_manage, then click Apply to N selected.
Recording retention
Retention isn’t set on the Cameras table — it’s a global policy under Settings → Recording (Recording Settings), which is superuser-only. It has two sections:
Storage Location
- Recording Path — where recordings are stored. Optional; if empty, a default is auto-detected (
Docker: /app/recordings,Local: ./recordings).
Retention Policy
| Setting | Default | Notes |
|---|---|---|
| Retention Days | 30 |
Recordings older than this are deleted automatically (0–3650). Set 0 to keep all recordings |
| Protect Flagged Recordings | (on) | When enabled, flagged/bookmarked recordings are never auto-deleted |
| Minimum Free Space (GB) | (empty) | If free space drops below this, the oldest recordings are deleted until space is freed. Leave empty to disable |
Save each section with its own Save Storage Settings / Save Retention Settings button.
[!WARNING] Setting Retention Days to
0keeps recordings forever. Pair long retention with a sensible Minimum Free Space (GB) threshold so the disk can’t fill completely.
📸 Screenshots to capture
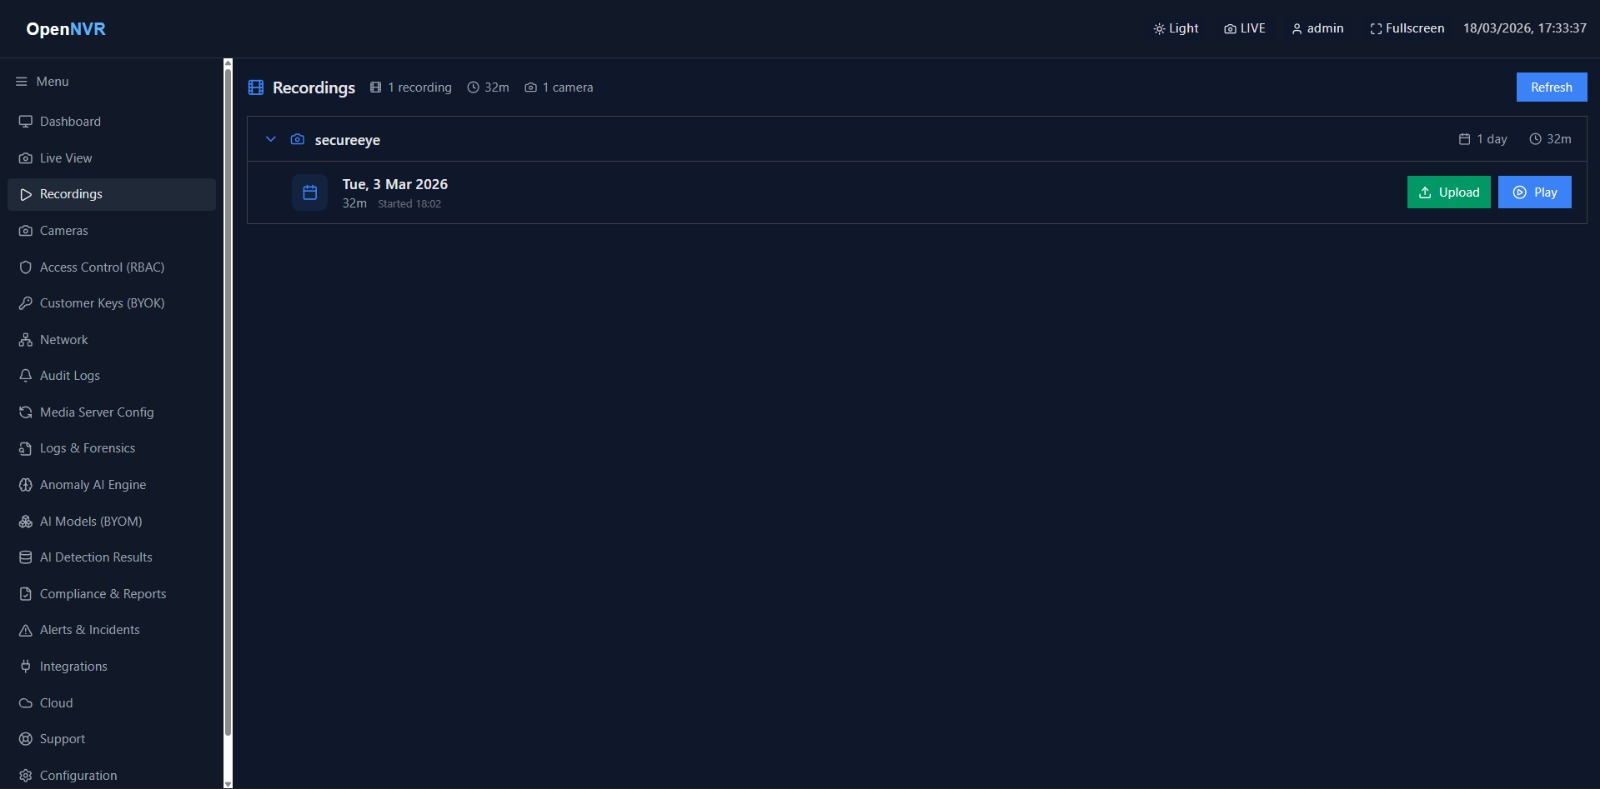
This page reuses cameratable.jpeg and cameratable with camerar.jpeg. New shots to add under opennvr-site/public/screenshots/:
cameras-edit-form.png— the Edit Camera dialog showing all fields (Name, IP, Port, RTSP URL, Substream URL, Username, Password, Location, VLAN, Description, Active).cameras-bulk-assign.png— the Assign Permissions panel with a user selected andcan_view/can_managecheckboxes.cameras-retention-settings.png— the Recording Settings page showing Storage Location and Retention Policy.