Cloud Streaming & Recording
Push per-camera streams to your own RTMP/RTMPS/SRT servers and upload recordings to S3-compatible cloud storage — fields, protocols, and start/stop controls.
On this page
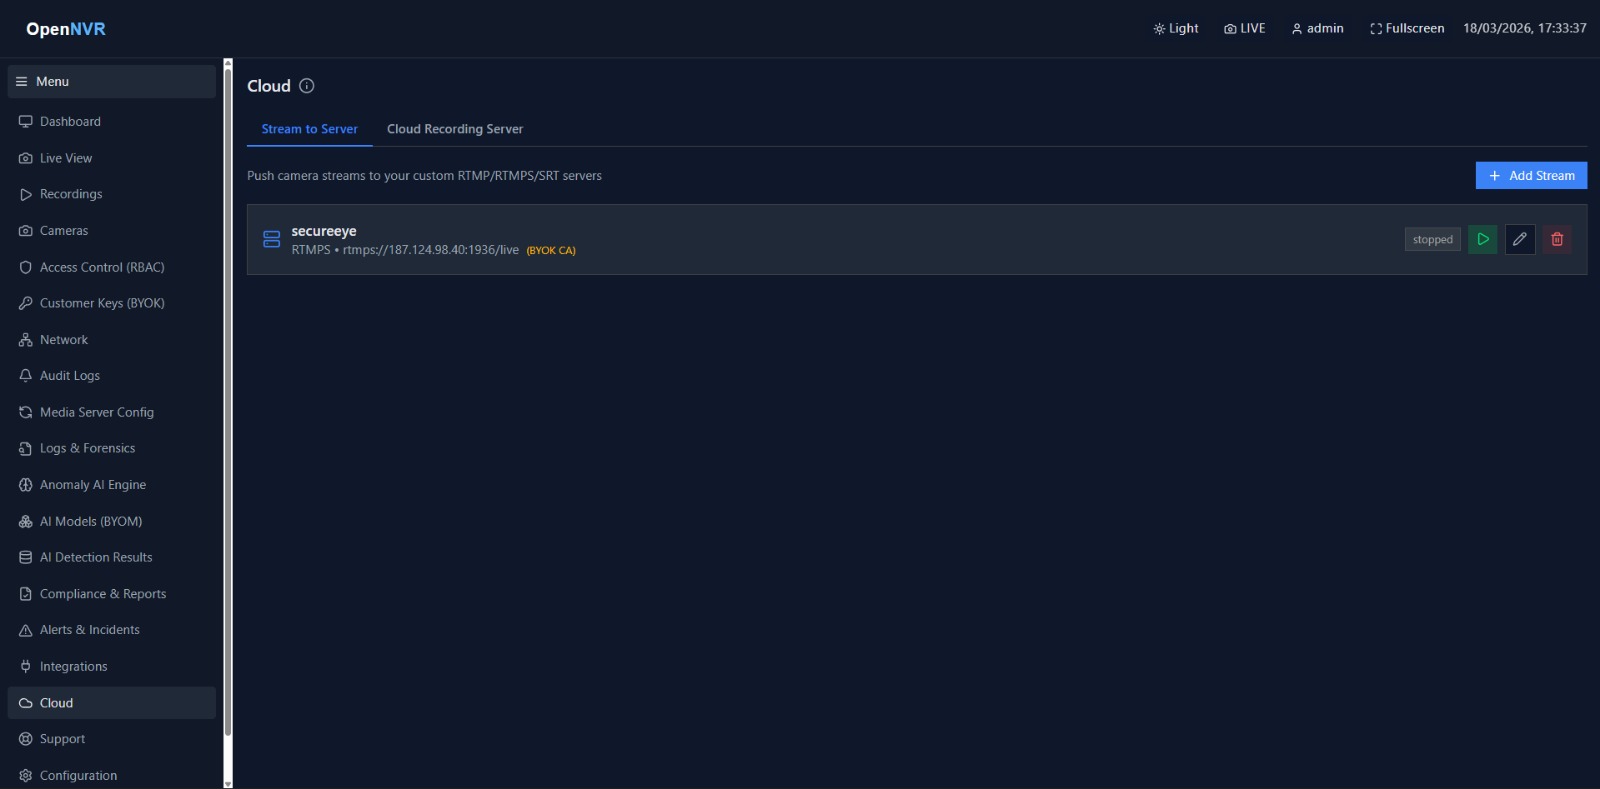
Cloud lets you push camera streams out to your own streaming servers and upload recordings to S3-compatible object storage. You’ll find it under Cloud in the sidebar (route /cloud). Click the info (ⓘ) icon next to the Cloud heading for a built-in explainer of supported server types and use cases.
[!NOTE] Viewing the Cloud page requires the
cloud.viewpermission. Saving stream targets or recording credentials is superuser-only — the backend rejects changes from non-superusers even if the page is visible (cloud.manage).
What you can do here
- Stream to Server — push any camera to an RTMP, RTMPS, or SRT server, then Start/Stop/Edit/Delete each target.
- Cloud Recording Server — upload recordings to AWS S3, MinIO, DigitalOcean Spaces, or any S3-compatible endpoint.
The page has two tabs at the top: Stream to Server and Cloud Recording Server.
Stream to Server
Each stream target binds one camera to one destination server. Targets appear as rows showing the camera name, PROTOCOL • server_url, a status badge (Streaming / stopped / error), and per-row controls.
- Click Add Stream (top-right; disabled until at least one camera exists). The Configure Stream Target dialog opens.
- Pick the Camera from the dropdown.
- Choose the Protocol: RTMP (Standard), RTMPS (TLS Encrypted), or SRT (Low Latency).
- Enter the Server URL (the placeholder and hint change with the protocol).
- Optionally set a Stream Key / Path (e.g.
camera1, or leave empty). - For RTMPS, optionally tick Use BYOK CA certificate (for self-signed certs).
- Set the Video Codec and, when re-encoding, an optional Video Bitrate.
- Click Save. The target is created stopped — click the Start (▶) control on its row to begin streaming.
Use the row controls to Start (▶) / Stop (■), Edit (✎), or Delete (🗑) a target. Editing a target leaves the Stream Key blank to preserve the existing key on the backend.
Fields
| Field | Required | Example | Notes |
|---|---|---|---|
| Camera | ✓ | (dropdown) | Which camera to push |
| Protocol | ✓ | RTMP / RTMPS / SRT |
Selects the transport |
| Server URL | ✓ | rtmp://192.168.1.100/live |
SRT hint: srt://192.168.1.100:9000; RTMPS: rtmps://secure.server.com/live |
| Stream Key / Path | — | camera1 |
Optional; leave empty to omit |
| Use BYOK CA certificate | — | (checkbox, RTMPS only) | For self-signed / private-CA servers |
| Video Codec | — | Copy (passthrough) |
Or H.264 (re-encode) / H.265 (re-encode) |
| Video Bitrate | — | 4000k |
Only when re-encoding; disabled for Copy |
[!TIP] Copy (passthrough) forwards the camera’s existing encoding unchanged — lowest CPU cost. Only pick H.264/H.265 (re-encode) if the destination server needs a specific codec or bitrate.
[!NOTE] RTMPS with a self-signed or private CA: tick Use BYOK CA certificate and load your CA into BYOK first, otherwise the TLS handshake to your server will fail.
Supported server types (from the in-app info dialog):
- RTMP — AntMedia, Nginx-RTMP, Wowza, Red5
- RTMPS — secure RTMP with TLS encryption
- SRT — low-latency streaming (Secure Reliable Transport)
Cloud Recording Server
The second tab uploads recordings to an S3-compatible bucket. Fill in the fields and click Save Settings.
- Tick Enable Cloud Recording Upload.
- Optionally tick Use BYOK Certificates for Cloud Upload (for endpoints with a private CA).
- Enter the Endpoint URL, Bucket Name, Access Key ID, Secret Access Key, and Region.
- Choose a Storage Class.
- Click Save Settings.
Fields
| Field | Required | Example | Notes |
|---|---|---|---|
| Enable Cloud Recording Upload | — | (checkbox) | Master toggle for uploads |
| Use BYOK Certificates for Cloud Upload | — | (checkbox) | Use your CA from BYOK for the endpoint TLS |
| Endpoint URL | ✓ | https://s3.amazonaws.com |
Or a custom endpoint (MinIO, Spaces, …) |
| Bucket Name | ✓ | my-recordings-bucket |
Target bucket |
| Access Key ID | ✓ | AKIAIOSFODNN7EXAMPLE |
|
| Secret Access Key | ✓ | wJalrXUtnFEMI/K7MDENG/bPxRfiCYEXAMPLEKEY |
Stored server-side; shown masked |
| Region | — | us-east-1 |
|
| Storage Class | — | Standard |
Standard / Standard-IA / One Zone-IA / Glacier / Glacier Deep Archive |
[!WARNING] Access and secret keys are cloud credentials. Only a superuser can save them, and archival storage classes (Glacier, Glacier Deep Archive) add retrieval delay and cost — pick them only for long-term cold storage.
📸 Screenshots to capture
Save to opennvr-site/public/screenshots/ with these exact filenames:
cloud-add-stream.png— the Configure Stream Target dialog with a camera selected, Protocol set to RTMP, and a Server URL filled in.cloud-recording-server.png— the Cloud Recording Server tab with the S3 fields and the Storage Class dropdown.